To both improve and maintain your Alexa’s sound quality, follow these steps:
- Regular Cleaning – It’s good to wipe your Echo Dot’s speakers down from time to time, as this clears debris and improves your Alexa’s sound quality.
- Power Cycling – Power cycling your device occasionally is healthy for your device performance, though we’d advise you not to overdo it.
- Strategic Placement – Proper positioning is crucial to maximize your Alexa’s volume and sound quality. You always want to place your device somewhere high up, free from obstructions and accident-prone areas.
- Tune your Sound Settings – Alexa has equalizer settings you can customize, allowing you to tailor your Echo Dot’s sound quality to better suit the content being played.
Improving Alexa’s sound quality is a good goal for any household with an Echo device, and doesn’t need anything more than simple maintenance, effective device placement, and sifting through a few menus. We’ll go over how to easily do all of that below.
Best Ways to Improve Alexa Sound Quality
Wipe Your Speakers Clean
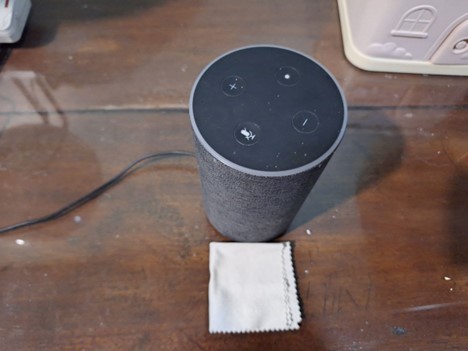
Dust and other built-up detritus can muffle your Echo Dot’s speakers, reducing both volume and clarity. A quick and gentle wipe over the speakers can make a world of difference and drastically improve your Alexa’s sound quality.
When wiping your Echo device’s speakers use a soft, dry cloth. Damp cloth might be better at removing dirt, but moisture could seep into your device and ruin it. Using alcohol or other cleaning solutions should be avoided as well, as sustained use could damage your Echo Dot – potentially even leading to errors or Alexa making weird noises!
If you’re not sure what fabric can work for this, we’d recommend using eyeglass cleaners. They’re typically made of microfiber, which makes them effective at gently removing debris.
Power Cycle your Device Regularly
Periodically power cycling your Echo Dot clears temporary files and frees up memory. While it won’t directly improve your Alexa’s sound quality, it’ll reduce the chance of encountering stuttering or distorted audio on top of improving general device performance. For best results, we’d recommend power cycling your Echo device no less than once a week.
On the flipside, you don’t want to power cycle your device more than twice a day – doing this shortens your Echo Dot’s lifespan, wearing out internal components faster than Amazon projected and eventually leading to premature device failure.
Be Mindful of Your Echo Dot Placement
Not all Echo Dots are created equal, but all of them benefit from thoughtful placement. Improving your Alexa’s sound quality may come from something as simple as finding a better spot for it.
We’d recommend that you place your Alexa somewhere high up and centralized, as this greatly improves sound projection and definition. It’d also be a good idea to ensure that it isn’t surrounded by walls, objects, or other barriers, as those could disrupt and muddle audio quality.
Be particularly mindful of items like pillows, rugs, and padded furniture – these can dampen your Alexa’s volume, as their soft surface absorbs sound waves extremely well.
Toy with Alexa’s Equalizer Settings
Echo devices come with equalizer settings in the Alexa menu, allowing users to adjust different audio frequencies to better suit the content being streamed.
Here’s how you can access Alexa’s audio equalizer settings:
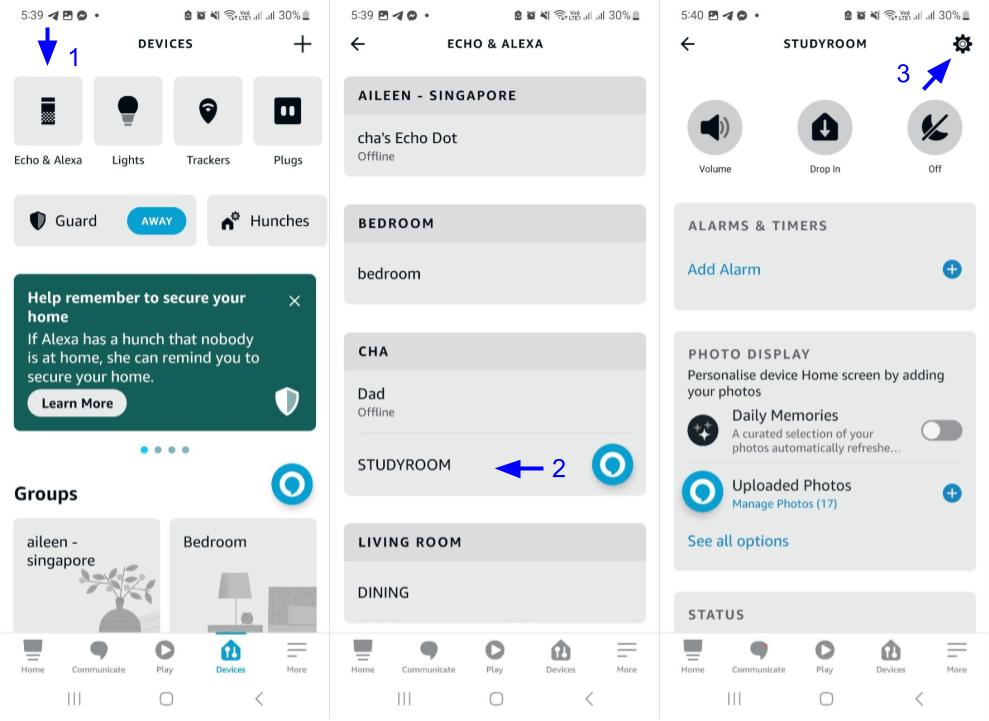
- On the Alexa app, tap “Devices”, and then “Echo & Alexa” on the upper left.
- Select the device you plan to change audio settings on.
- Tap the gear icon “Device Settings” on the upper right.
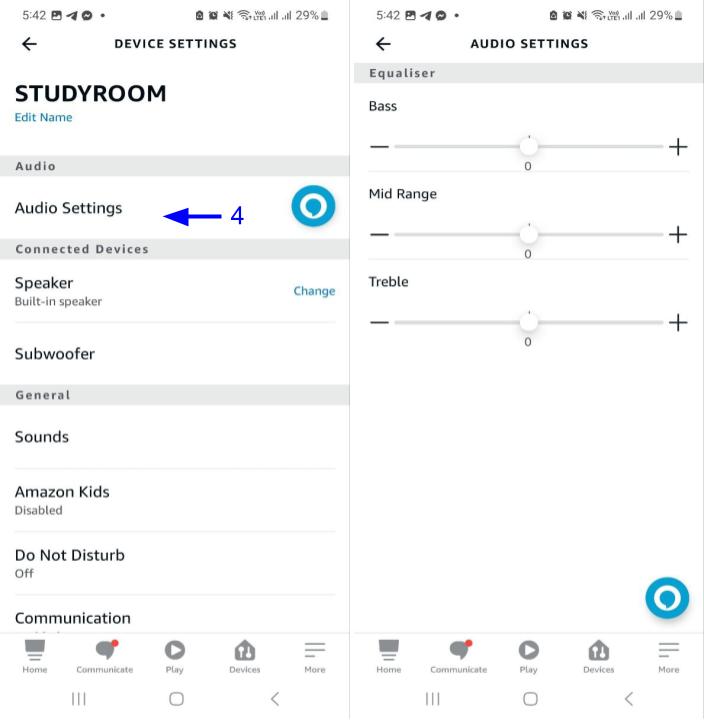
- Select “Audio Settings” from this interface.
- Make any adjustments you see fit using the three sliders.
Note that audio equalizer settings are linked to individual Echo devices, rather than being shared across the entire Alexa smart home network. This is useful for different types of content, as certain configurations will suit them much better than others – more on that later.
Equalizer Specifics
You’ll see sliders for three distinct frequencies: treble, midrange, and bass. Alexa’s default frequency settings are good enough for general usage, but if you want to improve your listening experience with specific types of content, we can give you a few pointers.
- If you want better music quality, boost the treble and bass frequencies. This helps your audio sound full-bodied and dynamic, even for units with subpar speakers!
- If you’re listening to content that’s heavy on dialogue (i.e., podcasts), you’ll want to boost your midrange frequency to improve audio clarity.
- If you’re listening to dialogue-heavy content that employs sound effects (i.e. movies, audiobooks) it’s worth boosting the bass frequency to make the audio cues more immersive and impactful. Doing this won’t detract from your dialogue clarity.
The environment should also play a significant role in your settings:
- In a small room, you’ll want more sophisticated audio – so you’d be adjusting treble and midrange for audio quality.
- In a large or outdoor area, it’ll be harder for your Alexa’s sounds to carry – so you’d be cranking the bass up to compensate.
Final Thoughts
An Echo Dot’s speakers are usually enough to get the job done, but there’s no harm in trying to improve your Alexa’s sound quality – especially if you love using it for content streaming applications like Soundcloud or Spotify. The best thing about these improvements is they’re a snap – a quick wipe of your speakers, minor menu navigation, and some prudent placement can completely transform your listening experience.
Don’t just take our word for it – try out our tips yourself and see what a difference they make! Your ears will thank you.